faut pas mollir
..............................................................................................
This guide assumes you have completed mounting your tank, have a boat tail and seat mounted, but no seat pan, padding cover, etc.
This guide is a simplified version of what i learned from a couple of the experts. Hopefully it works for you.
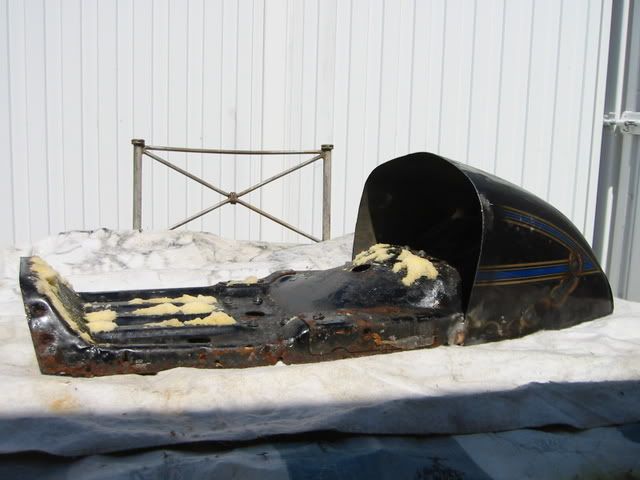
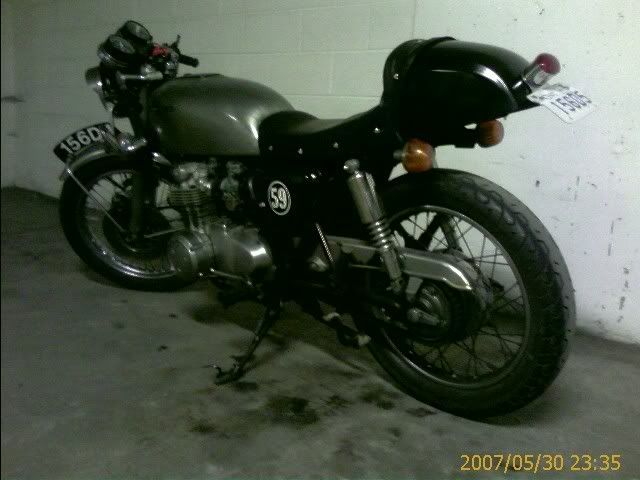
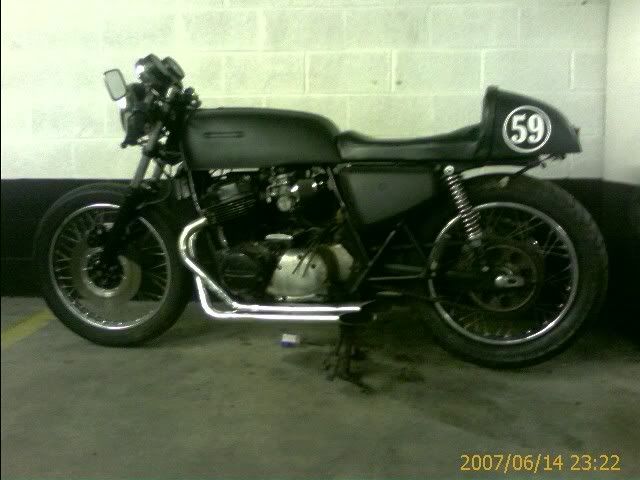
Here's my bike before the seat:

A padded seat consists of three parts:
1) Seat pan
2) Padding
3) Cover
All three of these parts can be constructed in different ways using different materials, but here is how I constructed my seat.
Stuff you'll need (Note costs are approximate)
cost - item
$ 5.00- Release wax
$25.00- Fiberglass fabric (crosshatch and weaved)
$15.00- Fiberglass resin and hardener
$ 2.00- A few matched nuts and bolts
$ 5.00- A few cheap paint brushes
$ 3.00- 1/4" X 1" softwood
$10.00- A proper file
$10.00- A good small handsaw
$20.00- Marine vinyl
$ 1.00- thread and a needle
$ 0.50- a couple of large sheets of craft paper
$ 1.00- a marker
$ 2.00- sewing pins and needles
$10.00- 2 square yards or meters of the thickest carpet under padding you can get
$10.00- 2 small cans of contact cement
$ 0.00- Staplegun
$ 0.00- Staples
$ 0.00- disposibl pie pans
$ 0.00- Stir sticks
$ 0.00- A drill and a bit the same size as the bolts.
$ 3.00- A couple of sheets of very flat foam rubber floor padding
$ 0.00- A cheap turkey carving knife
$ 0.00-Scotch tape
$ 0.00-Scissors
if your existing seat doesn't have a flat seat pan you'll also need the following
$ 1.00- thick cardboard
$ 7.00- duct tape
Total approximate cost
$130
Chapter 1 - Creating the seat pan
Step 0 - Creating the mould
For my bike, I was fortunate in that my tank and the boat tail was finished, sanded and painted. The boat tail seat also extended across the frame to meet up with the tank. If your boat tail doesn't go all the way to the tank, cut up the cardboard and duct tape it into place in the size and shape that the pan should cover.
Step 1 - Creating a staple frame
The first thing you want to do is to create the staple runners. All good seat pans have a couple of strips of softwood that is used to staple the fabric onto. For your seat, you'll want to take the strips of softwood and line the entire length of the pan, as well as the ends. In the end, you'll want to create at least two boxes: one for the floor of the pan, and one for the back of the seat. After you've cut the wood, staple them together so you have a weak, but functional frame.
Step 2 - Prepping the fiberglass fabric
Prepare three sheets of fiberglass. (2 cross-hatch, and 1 weaved). Lay the material down into the mold and cut away 1-2 inches larger then what you need. Fiberglass fabric moves around when you're applying the resin, so extra is always good.
Step 3 - Prepping the mold
Once you have the staple frame constructed, use one of the paint brushes and cover the entire mould surface and everything else around it with release wax. Release wax is very similar to polish wax, and can be easily buffed off afterwards. DO NOT use it sparingly. Any area that doesn't get covered in release wax simply will not release. I would advise to seriously go nuts with the stuff covering everything, or else you will have fiberglass resin stuck to anything not covered. I still have a couple of drops on my chrome battery panels which I still can't get off. GO NUTS! The stuff takes about 20 minutes to set. The stuff I used became milky white when it dried. WAIT FOR IT TO DRY
Step 4 - Playing with fiberglass - part 1
Lay the weaved fiberglass fabric on the mold. The weaved fiberglass is a lot more flexible then the cross hatch, and for a first layer, it's a good idea to have the most flexible of the two types. Then read the instructions on the resin & hardener. Understand the ratio you need, then pour the resin into a pie pan. Pour out the appropriate amount of hardener you need for the resin you poured and mix using the stir sticks. Note: This stuff hardens fast. Very very fast. Only mix what you can apply within 2-3 minutes. It sets THAT fast. Using a clean paintbrush, brush the fiberglass fabric, completely coating it. it'll probably take you a couple of rounds to get the weaved fiberglass completely covered. Try to keep the weave bubble less and tight to the mold as possible. Once you think you have enough resin on the weave layer, let it sit for 15 minutes
Step 5 - setting the staple frame
Lay the staple frame onto the hardened fiberglass. Get it as tight to the fiberglass as possible. Pour out the appropriate amount of hardener you need for the resin you need and mix using the stir sticks. Using a paint brush, paint the resin on the frame and the fiberglass ... glassing it into place.
Step 6 - Playing with fiberglass - part 2
This is important to do before the resin completely hardens. Take the first crosshatched fabric and put it in the mold. Then pour out the appropriate amount of hardener you need for the resin you need and mix using the stir sticks. Using a paint brush, paint the resin on the frame and the fiberglass ... glassing it into place. Again, try not to get bubbles. Then, repeat with the last sheet of crosshatch fabric.
Step 7 - Cleanup
Congratulations. You now have a seat pan. Let the whole thing sit for at least 2 days, and in the sun if possible. Resin is a strange thing. If you take it out of the mold too quickly, it'll lose it's shape. After the 2 days, use the marker and outline the edges of the pan, then cut it off using a combination of the handsaw and the file. File the edges smooth.
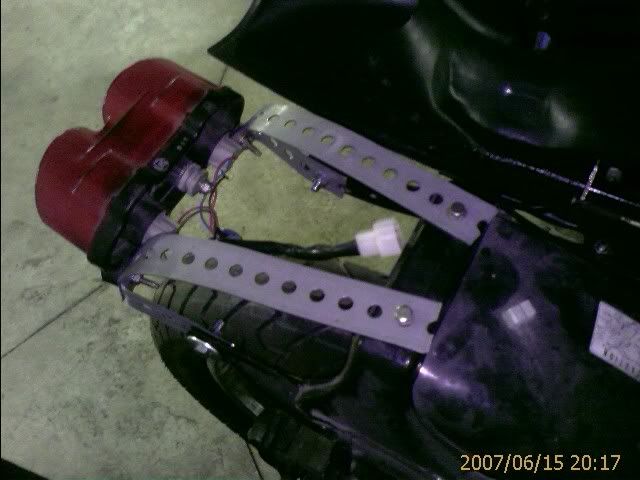
Step 8 - Securing your seat
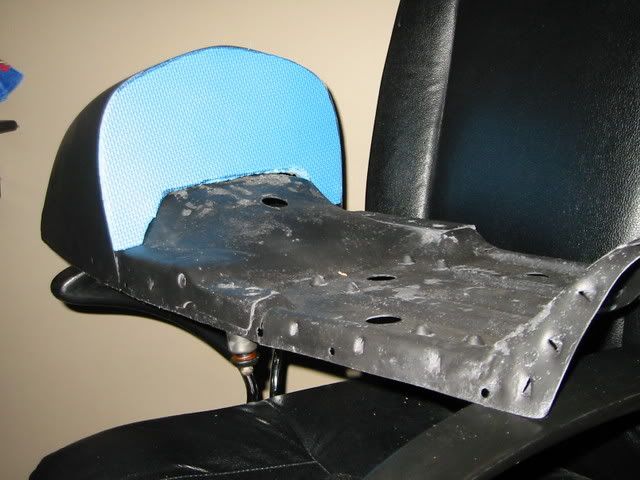
While the seat pan is still on the bike. Figure out how you want to secure the seat pan to the bike. For my bike. I used three nuts/bolts. Two that connect through the seat wall of the boat tail and one in the flat seat stretch of the pan. I simply drilled through both layers of the fiberglass. I then glassed in the bolts. Again, wait for a couple of days for the glass to set.
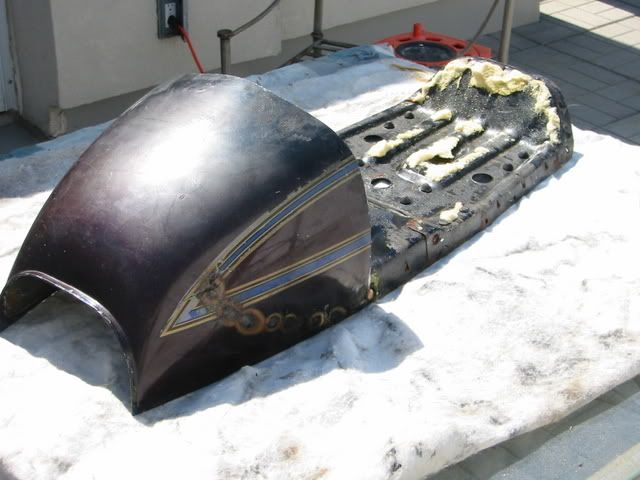
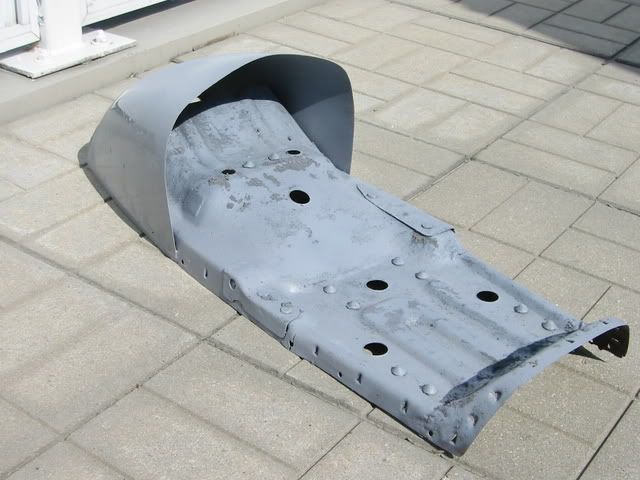
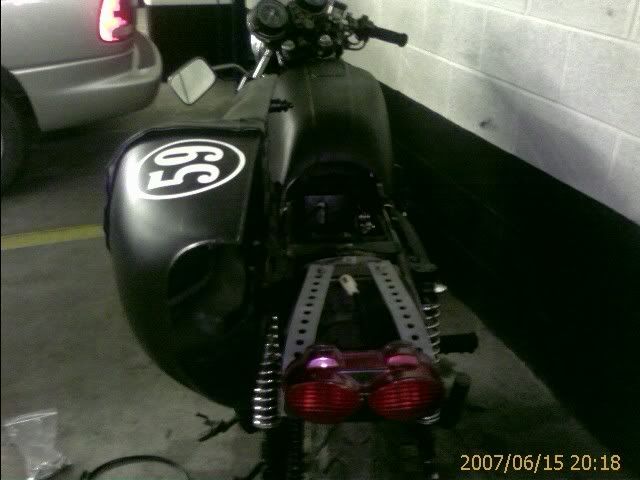
Here's what the seat pan looked like on my bike

Chapter 2 - Padding
Professional seat foam is stupidly expensive. For the size of the seat I wanted, I needed a piece of hard foam was going to cost me $79. After feeling the density and construction of the foam, I realized that this stuff was simply carpet under-padding but really really thick. I opted for the carpet under-padding.
Step 9 - Prepping the pan
Remove the pan from the bike. Take it inside and clean off all of the wax and any other residue on the seat pan.
Step 10 - Prepping the foam
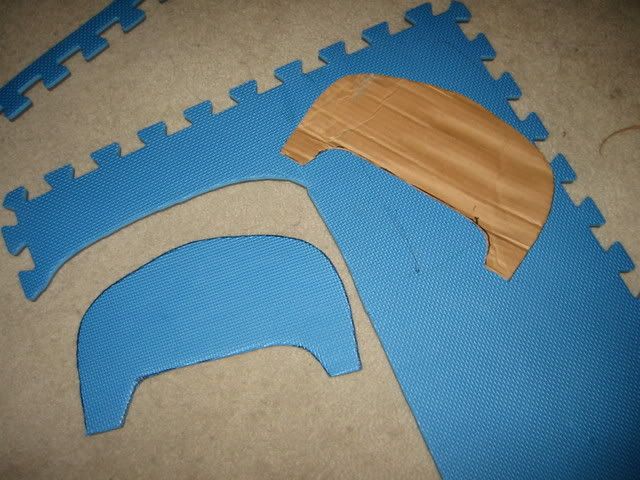
Take the carpet under-padding and start to cut it into sheets a couple of inches longer and wider then the area you want to cover. I decided I was going to carve out three pads - the main seat pad, the back of the seat and the nose of the seat.
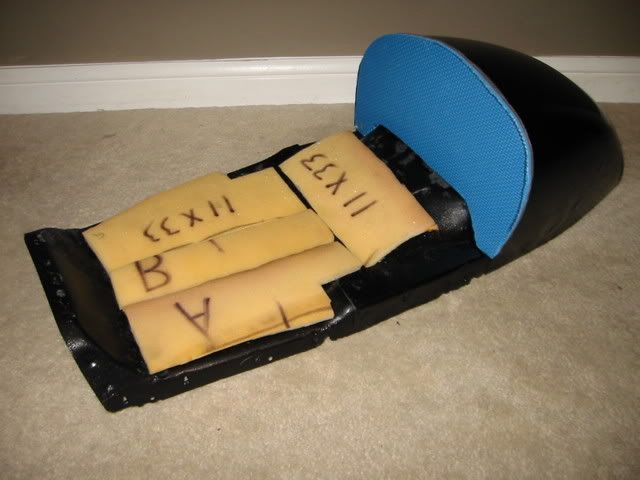
Step 11 - Gluing the foam
Apply the contact cement to both the seat pan and one side of the first sheet of the foam. When both surfaces are no longer tacky, put them together. Note: Contact cement becomes almost permanent once the two glued surfaces meet. Thus, be as precise as possible. The stuff also smells, so be prepared for that and make sure you have very good ventilation.
Step 12 - Building up the foam
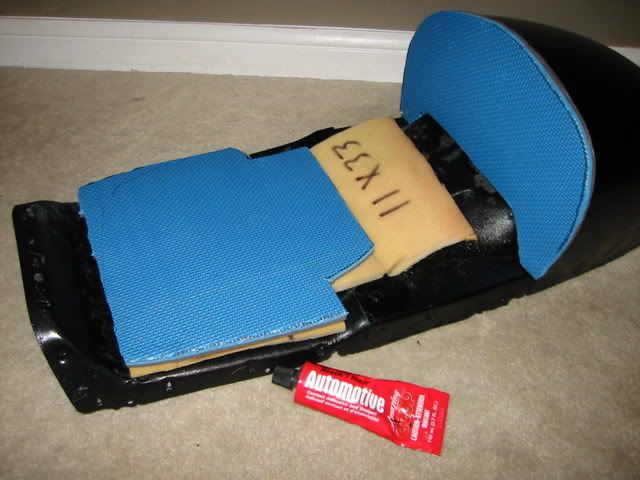
From this point, you basically repeat what you did in step 11, but gluing one pad to another pad. I would recommend that you have at least three layers of padding for the seat, or it'll be a rough ride. Continue to repeat until you think you have enough foam
Step 13 - Carving out your seat
Using the carving knife, shape the padding into the desired shape you want.
Step 14 - Final foam
Using the rubber floor padding, contact cement it into place and carve to get the final shape. You'll want to do this step as carpet underpadding can be a little rough once you start cutting away, and the rubber floor is always smooth.
Congratulations, you have finished the padding on your seat.
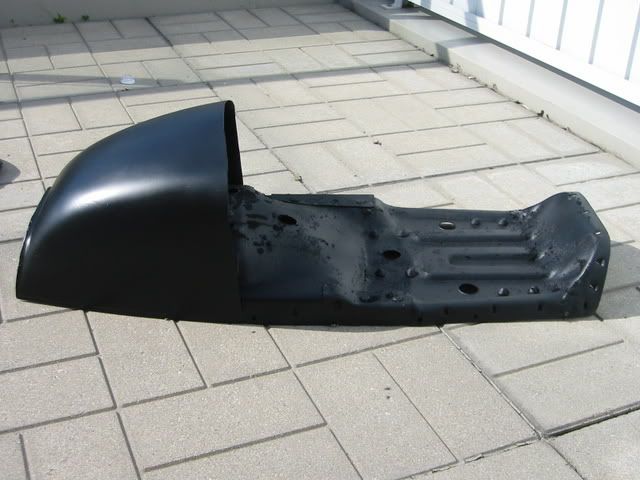
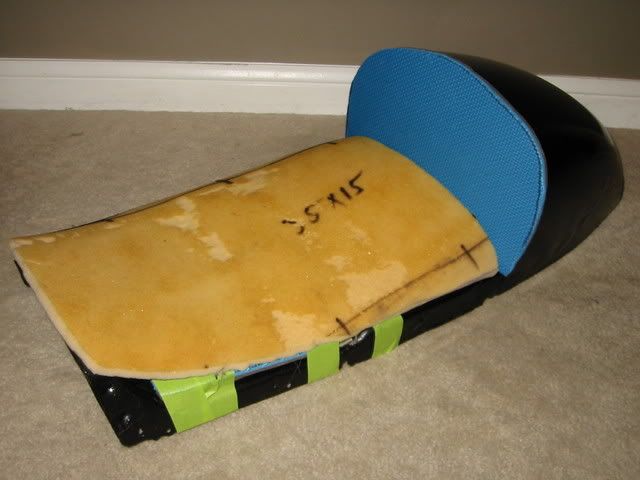
Here's what the padding looked like on my bike

Chapter 3 - Creating the cover
For this chapter ... seriously ... unless you've ever done any sewing (i.e. pattern making, making your own clothes, etc.), I would suggest you solicit the help of a loved one or friend that knows what they heck they're doing.
Step 15 - Creating a pattern
In order to know how the cover should be cut, you need to make a paper pattern. The paper pattern will be used to figure out the shape of the fabric, how big each piece should be and how it needs to be sewn together. There are two basic pieces to a bike seat: the main seat plain and walls. Think of it this way … every part of the seat that needs a corner will need a different piece of material.
Start with the main seat plain. Lay the craft paper onto the seat so that it tightly covers the seat plain. Using a combination of pins and scotch tape, secure the paper to the foam. Then, from underneath the paper at the edges of the main plain, use the marker to mark the edges of the plain. Then, take the sheet off, and cut the paper into the desired shape. Then tape and pin the sheet back on the foam. Repeat this process until you have completely covered the seat. Once you have completely covered the seat, you may want to even tape it together to make sure you’re happy with the result. Then mark the side of the paper that you want to face up with “face up”. Then remove the paper, and separate the sheets. Congratulations, you have a pattern.
Step 16 - Cutting the fabric
Lay out the marine vinyl, good side down on a table then put the paper patterns on the vinyl. Make sure the side you marked with “face up” is facing down. (Remember, the side facing up is the side you want to see, and since the side you want to see is on the bottom, the words “face up” should also be on the bottom). Using the marker, mark the entire edge of each sheet of paper on the vinyl. Make sure you space the pieces with at least 2 inches apart from each other. Then, cut out each sheet one at a time, with an extra 1/2 inch outside each of the sheets. For the edges you know will be the outsides, you’ll want at least 2-3 extra inches, as you’ll need to use this part to staple it in place.
Step 17 – Initial Construction
Now that you have all of the sheets cut, start to put together the sheets using pins. You’ll want to use pins until the sheets line up correctly. The pins should go through the lines you marked. Once you think you’ve got it together correctly, you’ll want to put in temporary stitches. A temporary stitch basically loops through the material 3-5 times. The idea of the temporary stitch, is to have something a little more permanent then pins.
Step 18 – Butt stitching
Now that the entire thing is lined up with temporary stitching, you’ll want to sew all of the lines together or sewing together the edges of each sheet. You have a choice of doing this by hand or taking it to a professional that works with leather … like a shoe repair guy. DO NOT USE A NORMAL HOME SEWING MACHINE. Vinyl is very thick, and you’ll likely either break a lot of needles or burn out your sewing machine.
Step 19 – Frilling
Now that your cover is sewn together, you’ll want to frill the left over material. DO NOT CUT IT OFF. Cutting off the extra material may result in ripping through the material. Don’t do it. Instead, use a pair of scissors and make really short frills (1/4 to 3/8 inches). Then using contact cement, glue them down. This step makes fitting the cover onto the seat much easier, and will present a cleaner look. For my seat, I actually took it back to the professional to sew the frills down. This gave my seat a professional double stitched look.
Step 20 – Mounting the cover
Start by contact cementing the cover into place. This just prevents the cover from moving around while you’re stapling it into place.
Mounting a cover onto the seat is much like changing a tire on a car. You start by mounting the cover on the seat, then putting one staple through the material into the staple frame, through the first layer of fiberglass, preferably in the middle of the seat on one of the sides. Then, to get it nice and tight, staple the exact opposite side. Now imagine a line running from the one staple to the other staple. The next staples should be directly perpendicular to the line you just stapled, thus in the very middle of one of the ends. Then, staple the exact opposite of that last staple. From there, the next staple should be half way between two existing staples, then the opposite, then perpendicular, then opposite. Repeat until you have a solid line of staples. Then ... you’re done.

Mount the seat on your bike and go for a ride on your new custom seat.